What can you draw on the theme of Christmas. Appetizing pictures for Christmas
Tools and materials that you will need to draw Christmas:
- Paper;
- Colour pencils;
- Simple pencil;
- Eraser.
Stages of work:
With a simple pencil, we will create a general image of the future drawing. Without much clarification of the details, we outline the location of the angel, and a spruce branch will be located a little to the left. Behind the angel, on the background, place a circle, and enclose the entire drawing in a rectangle. Part of the wings and branches will go beyond the frame of the Night before Christmas picture. Drawing Christmas is not as difficult as it seems, just try and put in more effort; 
We begin to draw Christmas in stages with a pencil in more detail. Let's make wavy hair, rounded features and draw wings. At the bottom of the image will be a small sketch of the landscape. Let's draw the silhouettes of houses, but do not specify too much, because fog will surround them; 
We add facial features and folds on the angel's clothes. We remove the auxiliary lines with an eraser and move on to color; 
Let's start with yellow. Let's draw hair, a spruce branch, a candle and a circle on the background - a beautiful Christmas drawing is already starting to turn out; 
Beige is used for skin. We shade the face and hands. Next, draw brown hair. You need to try hard so that you manage to draw Christmas beautiful, neat and bright; 
Let's go to the branch. For her, take two shades of green. With sharp strokes we will create spruce needles; 
Let's move on to the background of the picture for Christmas. Let's make it blue. Let's sketch the inner circle and the lower part of the background. We make a slight transition from dark blue to a light shade; 
For the landscape below, take purple and blue. We can add these lights a little on the contours of the wings. Maybe you decided to paint Christmas with paints or just leave it in black and white? 
Christmas is the most solemn and bright holiday for all Christians. It is not necessary to be a true believer in order to celebrate this wonderful holiday together with everyone. Introducing children to Christmas traditions is an integral part of their development. Seeing on the example of their relatives how people expect this holiday, the children themselves are looking forward to it, believing in miracles.
Traditionally, in anticipation of the holiday, children made Christmas drawings with their own hands. At this time, exhibitions of such works drawn by children's hands are organized everywhere in various children's centers.
Children's drawings on the theme "Christmas" will help to decorate your home, because everything that is made by oneself brings warmth and comfort to the home, filling it with joy and love, especially if these are children's hands. To captivate the children, adults must also make their own contribution to this activity. After all, the genuine interest of parents inspires the kids, and they are happy to fantasize on the chosen topic, knowing that their work will be appreciated.
What to suggest to draw a child?What drawings can be offered for children to draw for Christmas? Many people like to depict a starry night and against its background houses with white smoke coming from pipes. Kids with the help of their parents will cope with the drawing of a flying angel, and older children can be invited to draw with its inhabitants - the Magi, baby Jesus, Joseph, Mary, oxen and sheep.
Children's Christmas drawings can be made using ordinary colored pencils, felt-tip pens, a simple pencil or paints (gouache, watercolor), depending on what the child is more drawn to and what he does best. Anything can serve as a canvas, but for the best effect, you need to take thick paper.
 |
 |
This truly magical holiday is looked forward to by thousands of people every year. They decorate houses, prepare gifts and read stories related to Christmas.
Draw a Christmas Story

The scene of the birth of Jesus Christ
To draw the Nativity of Christ, you need to prepare the tools:
- paper;
- colored pencils (set);
- simple pencil;
- sharpener;
- eraser.
However, you can use paints instead of pencils, then you need paper that is denser than regular office A4. As in children's albums, there the sheets are adapted for drawing with paints.
Any drawing reflects some picture of what is happening. Will it be a portrait of one character or a whole scene. You can see the finished images for Christmas for an example.
Sample plot: "An angel looks down on the newborn Jesus."
Stages of work:
- Sharpen a pencil and sit comfortably, mentally divide the sheet into several zones. In one there will be the sky with the figure of an angel, in the second - the earth. If the angel is the central figure, you can give him more space and draw his figure more clearly.
- Make pencil sketches. Without clarification, outline where the angel is located, its silhouette is approximately. What is around - clouds, the Moon, the Star of Bethlehem and other symbols of the holiday.
- At the bottom, sketch out the trees, the outlines of the barn. It is not necessary to add silhouettes of animals. In the drawing, the emphasis is on the angel. He seems to be looking at something happening at night on earth.
- When the draft is ready, proceed to drawing the details. Pay attention to the location and size of the angel's wings, his appearance. Draw hair, facial features, try to convey the expression of the eyes. The whole figure of the character is directed downwards, he sits or hovering in the sky. Perhaps part of the figure is hidden by a cloud.
- Below, in addition to the trees and the roof of the barn, you can add the silhouettes of several houses. Just sketches without detailed clarification, because they are surrounded by night fog. Picture of Christmas night and the first messenger who saw a miracle.
- To find out what angel wings look like, you can view several ready-made images. The most difficult thing in the picture is he, in addition, the character is the main figure. Therefore, we need to work harder on it. Draw the folds of the clothes, the facial features, the angel's hairstyle. Use the eraser to carefully remove the extra lines.
- When the pencil sketch of the picture is ready, decorate it.
The scene of the gifts of the Magi
Of course, this scene is the most popular, it seems to reflect the spirit of the holiday. How to draw multiple silhouettes and character interaction? It is necessary to act in stages, clearly imagining where each figure is, what it does. Its dimensions and form of interaction.
What will be required:
- paper;
- set of pencils;
- simple pencil;
- eraser;
- sharpener.
Would you be interested in doing this craft with your child?
YesNo
Stages of work:
- Creating a pencil drawing in stages begins with the presentation of the plot of the picture. Look at some of the finished images, read stories to get a sense of what's going on. In a small barn at night the Savior was born and several wise men came to look. They gave gifts. What do these strangers look like? According to some sources, they were travelers in ordinary travel clothes. According to others - real kings. Whom to portray them choose for yourself.
- Who, besides the Magi, will be present in the picture - the Mother of God Mary, the newborn Jesus himself, perhaps several animals. The central figure uniting all the characters is Christ. And the location is the interior of the barn.
- Beginning of drawing. Having placed the sheet in front of you, outline the silhouettes of the characters with a pencil. Where are they located, what size. When there are several characters of people, it is important to observe their proportions so that everyone in the picture is the same. Animals can be added later. Imagine what everyone is doing. For example, a couple of Magi have already entered and are watching, the third has stopped on the threshold. The Mother of God sits next to the reclining Jesus, around the silhouettes of a pair of animals. For example, a bull and a goat.
- If you are not too confident in your drawing skills, you can imagine a picture from a distance, when only the dark silhouettes of the characters are visible. This makes them easier to draw. At the same time, more details of the surrounding world are visible: the burning Star of Bethlehem, the trees around, perhaps the silhouettes of houses. As if the artist is a spectator watching what is happening from afar.
- Sketch with a pencil. First, one character: body lines, face and hand arrangement, clothes. Then the second. Create a composition. Remember, the faces of those present are turned to the reclining Jesus, they are smiling, because a wonderful, bright event has happened. It is important to convey the mood of the characters.
- There is no need to bother much with clothes: the traveler has long raincoats on the road, staffs are in their hands, and the Mother of God is in a simple long dress, her hair is removed. Jesus is wrapped in cloth.
- When you're done with the rough sketches, color the picture. If there is a candle in the picture, it is necessary to convey its light and darkening areas. You can draw the Star of Bethlehem, as if she looked into the room and illuminated it.
Good afternoon, the holidays continue, we have already met New Year, now ahead of the equally important holiday of Christmas. And we invite everyone who loves to draw to depict this wonderful holiday. Today we draw Christmas.
This warm bright home holiday will be drawn in stages according to our instructions. Looking at this picture immediately becomes warm and cozy. After all, there is nothing more beautiful than a home where you are loved and expected. Merry Christmas!
Step 1
Since there are several objects in the drawing, we will draw different shapes. Let's start with the table, which is located at the bottom of the picture. Let's draw the auxiliary lines for the fireplace, it looks like a triple candlestick. Then draw a rounded shape for the tree.

Step 2
Now let's start sketching out the long needles of our Christmas tree. Next, draw the lines crosswise, as shown in the figure.

Step 3
Let's make the line of the table thicker, and then draw a plate with cookies on it. Now let's draw Christmas gifts in a beautiful wrapper with bows under the tree.
http://xbit.money/ wmz exchange exchanger registration of an application for an exchange.

Step 4
We decorate the fireplace with bricks, and then draw Christmas socks hanging on the edge of the fireplace. Let's draw logs and flames in the fireplace and add a couple more gifts.

Step 5
Now let's draw a festive picture on the fireplace. Draw an armchair by the fireplace. Decorate the Christmas tree with toys and garlands and remove the auxiliary lines.

Step 6
The drawing should look something like this. Now you can colorize it.

We wish you good, love and Merry Christmas. If you liked our lesson , then you can bookmark our site, but rather subscribe to our new lessons and we ourselves will send news of new lessons directly to your mail. Good luck!
safe II class-Valberg Garant Euro 133T EL - buy in Moscow. Buy tarpaulin in bulk even more.
Christmas days are always filled with a sense of fairy tale and magic. This holiday is awaited not only by children, but also by adults. And how nice it is for parents to receive a handmade greeting card from children's hands. You can make a Christmas card with your child or on your own - it will certainly become a good gift not only for relatives, but also for friends and work colleagues.
How to draw a Christmas card?
Initially, it may seem that it is not so easy to do. However, if you dream up a little and make an effort, you can create a real masterpiece from an ordinary sheet of paper with pencils and paints. First you need to decide what size the postcard will be, what its design and composition will be. Most often, they take a simple landscape sheet, bend it in half - and the basis for the future postcard is ready. The front sheet is decorated with a pattern or crafts, and an ornament is also usually applied to the back. Inside, you can write a beautiful congratulation, paste in several decorated elements, or simply paint with drawings. Usually, angels, a decorated Christmas tree, or pictures from biblical stories are chosen for the Christmas theme. The first step is to sketch the drawing.
What to do?
How to draw a Christmas card step by step? As mentioned above, first we prepare the necessary material and the objects with which we will draw. The second step is a sketch of the drawing, which will be the main one. Let's say for the front side of the card we chose a decorated Christmas tree with gifts next to it. First, you will need to draw any Christmas cards with a pencil - this way we will avoid unnecessary spades or uneven edges (if, for example, we draw with paints right away). It is best to choose a pencil marked TM - that is, not very hard (so as not to leave furrows on the sheet), but not too soft (it will smear and stain the drawing). Do not press too hard on the stylus - if the line is wrong, it will be difficult to erase without leaving a trace. We draw the outline of the Christmas tree - three triangles of different sizes, under the bottom (largest) - a rectangle (stump). Near the stump we sketch several squares of different sizes. It is best to draw them not in a straight sequence, but a little randomly (with a slope, on top of each other), then the drawing will look much more interesting.
Stage two
So, the first and main step is made. Consider further how to draw a Christmas card in stages. Now we need to decorate each Christmas tree triangle by adding spruce paws to it. To do this, we draw small lines to the sides along the edges of the base, and sketch strokes around them. You can simply get by with rounded edges - draw a wavy line from the lower left corner of the triangle to the right corner. Repeat the same with the remaining triangles. Remember that we need to draw a Christmas card, which means transferring the spirit of Christmas to it. Therefore, we decorate our Christmas tree with everything we can: round balls, cones, iridescent garlands, gingerbread houses, sweet candies, and most importantly, a beautiful star at the very top.

By the way
By the same example, as we started working with a Christmas card, you can understand how to draw a New Year's card. The theme of the New Year is the animals near the Christmas tree, children's round dances, Father Frost and the Snow Maiden hurrying to the children, colorful fireworks in the sky, funny snowmen on sleds and much more. Just like in our example, you must first decide: what do you want to see on the postcard? Maybe it will be a whole fairy-tale scene, or maybe a simple spruce branch, decorated with one or two balls.

You can use pencils, felt-tip pens, and paints - the choice is huge, and only your imagination can tell you how to draw a New Year's card. To make it look even more elegant, you can smear several sections with transparent glue and sprinkle finely chopped rain or special sequins on top of it.
Back to the theme of Christmas
To draw a Christmas card with your own hands means to fully use your own imagination. Having decorated the Christmas tree, we move on to gifts. Here you can use not only paints and pencils, but also an application. Cut out squares from bright paper and stick them on the ones drawn with a pencil. Draw or glue an elegant bow on top of each box - the gifts are ready. The next step is coloring. If the work is done with felt-tip pens, then you should only be careful not to step over the lines of the drawing. If paints or gouache are used, you should carefully monitor that where several colors touch, the paints dry well, otherwise they will simply blur. Of course, for the postcard you need to choose bright and cheerful colors. When it is completely painted, and then it dries well, inadvertently smeared lines can be painted on with felt-tip pens. It is impossible to draw contours even on a slightly dry drawing - the tip of the felt-tip pen can tear wet paper, and the drawn line simply blurs.

The final stage
So, we have learned how to draw a Christmas card. The front side is usually decorated a little more elegantly than the last sheet (from which, upon contact with the table, everything can simply crumble). On the paws of the Christmas tree, you can apply a snowball - strokes of white paint, simple toothpaste, or stick small lumps of cotton wool. It is worth adding glitter - as mentioned above, sprinkle rain and sparkles on the places smeared with glue.

You can also decorate the card with stars made of shiny paper or foil, because the star is the main symbol of the Christmas holiday. It is necessary to place a congratulatory text inside the postcard - it is better to write it by hand, and not paste a piece of paper printed on the printer with congratulations. The author's work must be original from beginning to end. And one more thing: it is worth remembering that Christmas stories are very diverse - you should not close yourself only on the Christmas tree. The ideal option would be to choose one of the biblical episodes - for example, the little Savior in the manger. However, such work will require more diligence and diligence, and you need to take on it with thorough preparation and tuning.
Postcard is ready
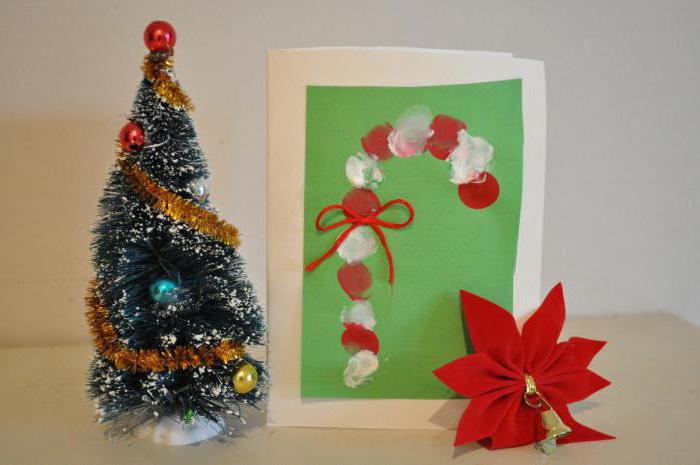
Drawing a Christmas card is not all. It still needs to be given properly. If you want to make a surprise, and not just give it to the addressee, it is better to put the card under the Christmas tree or right on the festive table.